Building a Portfolio with Jekyll
So you need to build a portfolio…
I’ve spent most of my professional experience to date doing web development to some extent. I’ve been exposed to lots of frameworks, but that makes it hard to get started building a portfolio. I could use a full framework like Express or Ruby on Rails, or go to the dark side and new up a Wordpress site (total joke I would never stoop that low). But I find myself slapping together this site using Jekyll, a blog-aware, static site generator that a surprisingly high number of developers haven’t heard of.
Why use Jekyll?
Most sites out there are dynamic and odds are if you’re a web developer, you will almost always need to accept user input, do something in the back-end and communicate back to the user. This is the overly boarish reason why you might use a web framework. But a portfolio doesn’t need to be dynamic or accept user input. It also doesn’t need support for user authentication or a complex SPA powered by a custom API.
Your portfolio is a static site and Jekyll is often talked about as the most powerful static site generator out there. Oh, and it also happens to be the engine behind GitHub Pages, which means it’s adoption is huge and you can use it to host any of your project’s pages, blogs or websites from GitHub’s servers for free.
Alright, let’s give this thing a shot
Jekyll is built in Ruby, and thus requires you have a full Ruby development environment with all headers and RubyGems installed (see Jekyll’s requirements).
Hello, World!
Once you’ve got a working Ruby environment set up, go ahead and create a new Jekyll site by doing the following:
### Install the Jekyll and Bundler gems through RubyGems
~ $ gem install jekyll bundler

### Create a new Jekyll site at ./portfolio
~ $ jekyll new portfolio

### Change into your new directory
~ $ cd portfolio

### Build and serve the site locally
~ $ bundle exec jekyll serve

### Now browse to http://localhost:4000
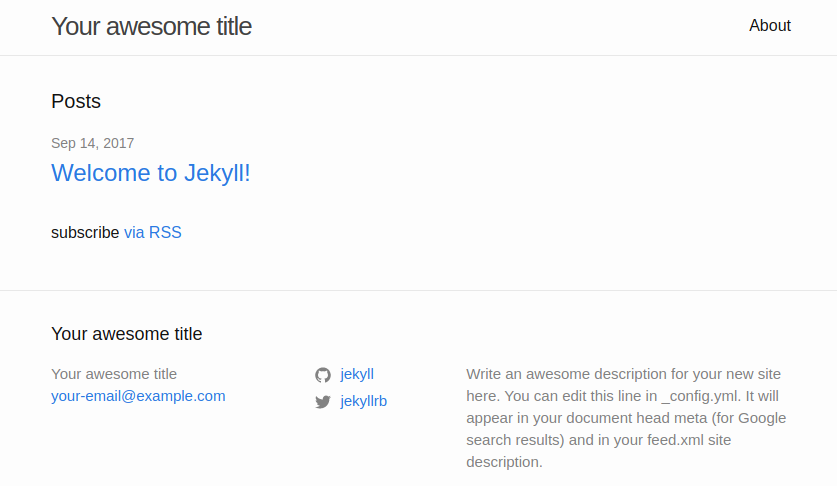
When you navigate to the port listed above in a browser, you should now see the following:
Exploring our World
A basic Jekyll site usually looks something like this:
├── _config.yml
├── _data
|   └── members.yml
├── _drafts
|   ├── begin-with-the-crazy-ideas.md
|   └── on-simplicity-in-technology.md
├── _includes
|   ├── footer.html
|   └── header.html
├── _layouts
|   ├── default.html
|   └── post.html
├── _posts
|   ├── 2007-10-29-why-every-programmer-should-play-nethack.md
|   └── 2009-04-26-barcamp-boston-4-roundup.md
├── _sass
|   ├── _base.scss
|   └── _layout.scss
├── _site
├── .jekyll-metadata
└── index.html # can also be an 'index.md' with valid YAML Frontmatter
At it’s core, Jekyll is simply a text transformation engine. You input text (in your favourite markup language) and it outputs layout files. For a deeper dive into the directory structure and full descriptions of what each file/directory is for, view the Jekyll docs.
For the sake of this tutorial, let’s get a hands-on view of what we have.
_config.yml
Jekyll uses a config.yml file for configuration. Go ahead and fill in the title, email, description and social handles. Upon making changes, stop serving the site and rebundle and serve it by executing bundle exec jekyll serve as before. Note that this is only necessary when configuration changes are made. Verify your changes are reflected in the browser.
Posts
One of Jekyll’s primary aspects is that it is “blog aware”. This means blogging was baked into Jekyll’s functionality. You can publish and maintain a blog simply by managing a folder of text-files on your computer. This removes all of the hassle of maintaining a database and web-based CMS systems.
The _posts folder is where the blog posts live. Natively, they can be Markdown or HTML but other formats can be used with the proper converter. All posts must have a YAML Front Matter and will be converted from their source formats into an HTML page that becomes part of your static site. In your browser, you may have seen the Welcome to Jekyll! post. Take a look at that post in the _posts directory to build an understanding of how it’s generated.
As I write this blog post, I am doing it directly in the portfolio I’m creating. If you’d like to work along and try creating a post, simply create a new .md or .html file in the _posts directory with the following name format: YEAR-MONTH-DAY-title.MARKUP. We’ll get into layouts and tweaking the format of this post and others using Front Matter later. If you’ve created a new post, you should see it both on the index/root page of your site and in the details view.
Front Matter
The pages, such as the title page and preface, that precede the main text of a book.
In a Jekyll setting, Front Matter tells Jekyll that this file is special and to treat the values between the triple-dashed lines as configuration.
Add the following YAML front matter block to the post you created:
---
layout: post
title: Your new dank post
---
By adding the predefined layout variable to your front matter, you’ll notice the new post’s styling become beautiful, just like the Welcome to Jekyll! post.
Themes and Layouts
By default, your portfolio is using the minima theme (check _config.yml to verify). As we just saw, adding layout: post to the front matter seems to add magical styling and render the post inside our site (the navbar is still visible at the top).
What actually happens under the hood is Jekyll sees the post layout defined, takes all the content from the file, and renders it as content inside the post layout.
But where does that layout live? How can I make edits to it if I don’t like the layout? I highly advise you give the documentation on themes a read, but at a high level: some of the site’s directories (such as the assets, _layouts, _includes, and _sass directories) are stored in the theme’s gem, hidden from your immediate view. Yet all of the necessary directories will be read and processed during Jekyll’s build process.
To override the theme’s default post layout, we need to make a copy in a _layouts folder under our root directory: _layouts/post.html.
- Locate the current theme by executing
bundle show minima. - Using the returned location, make a copy of the file into the location highlighted above.
- You do you. Make all the modifications you want. For this tutorial, I will be sticking with the default layout.
This is cool, but I’m building a portfolio
Enough of this blogging crap the crowd screamed… I came here to build a portfolio.
Before we start making changes to the layout, let’s break apart what we want our portfolio to have.
- A top level navbar to switch between a portfolio (our site’s home page), a blog (if you want one) and an about page
- A downloadable version of a resume
- Sections on the portfolio page for all our different chunks of information (ie: work experience, education, projects, etc.)
- A little bit of sexiness through themes/styling
With our goals in mind, let’s tackle them one at a time.
Navigation
Breaking up pages
Before we make changes to the navigation, let’s go ahead and make our blog an explicit page in our application. We will start by basing this page off of the about.md page located in our root directory. The important things to note are that the about.md page specifies layout: page, a title and a permalink in the front matter.
Create a blog.md page in the root directory with dummy content, it should look something like this:
---
layout: page
title: Blog
permalink: /blog/
---

This is my dope-ass new blog
By simply adding this page, you should notice upon refreshing that Blog now auto-magically appears in the navbar, and the http://localhost:4000/blog/ URL brings you to your dope-ass new blog.
Modifying the existing plumbing
Current status of our existing site:
- The root page has the content we’d ideally like for our Blog page
- The Blog page just has the empty dummy content we entered
- The About page has the info it should (change at your own convenience)
Let’s fix these in order.
Change the blog page to be an html page and with the following markup:
---
layout: page
title: Blog
permalink: /blog/
---

<div class="home">
  <h1 class="page-heading">Posts</h1>
  <ul class="post-list">
    {% for post in site.posts %}
      <li>
        {% assign date_format = site.minima.date_format | default: "%b %-d, %Y" %}
        <span class="post-meta">{{ post.date | date: date_format }}</span>

        <h2>
          <a class="post-link" href="{{ post.url | relative_url }}">{{ post.title | escape }}</a>
        </h2>
      </li>
    {% endfor %}
  </ul>
  <p class="rss-subscribe">subscribe <a href="{{ "/feed.xml" | relative_url }}">via RSS</a></p>
</div>
index.md is the page our site loads for it’s root, and where we want our portfolio to exist. Noting that all this page does is define Front Matter that references minima’s home layout, let’s go ahead and override that. As explained in the Themes and Layouts section of this post, go ahead and override the default home behaviour by creating a new home.html file in the _layouts directory and temporarily fill it with dummy content.
---
layout: default
---

<div class="home">
  <h1>Hire me plz, thx.</h1>
</div>
In an ideal world, employers already know how awesome we are and our portfolio is done with something like the following!
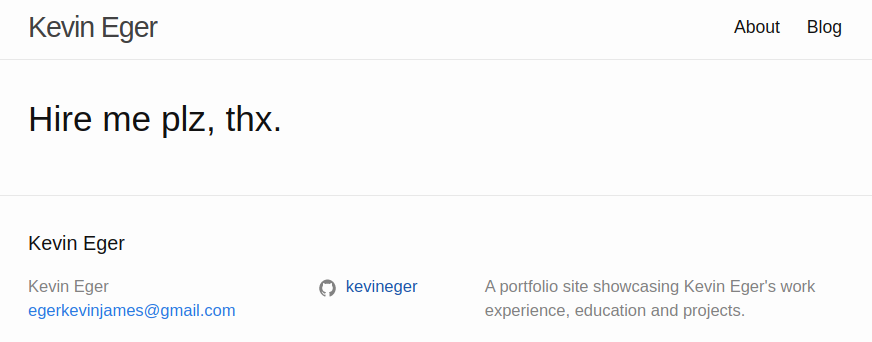
Unfortunately, our world is far from ideal. But that’s more of an existential conversation that we’ll table for now. Let’s concentrate on continuing to build awesome things with Jekyll.
As I see it, there are two ways to fundamentally show your portfolio off.
- In a clean single page layout with obvious blocking and succinct navigation
- In a page-based flow, where each portfolio item (ie: work experience, education, etc.) is on a different page.
I will be opting for the former method, but if you do want to have separate pages and leverage Jekyll’s custom collections - check out Max Antonucci’s blog post!
For each of the sections on the portfolio, we are rendering some markdown-content into a card.html template that we will later leverage for styling.
Create the card.html template inside the _includes directory with the following:
<section class="card">
    <header class="card-title">
        <h1>
            {{ include.title }}
        </h1>
    </header>
    <div class="card-content">
        <!-- Markdown Content -->
        {% if include.markdown-content %}
            {% capture my_include %}{% include portfolio/{{ include.markdown-content }} %}{% endcapture %}
            {{ my_include | markdownify }}
        {% endif %}
    </div>
</section>
One of the fundamental template tags we will leverage is {% include some_file.MARKUP %}. The include template will allow us to use partials to inject the corresponding markup wherever specified.
---
layout: default
---

{% include card.html title="Objective" markdown-content="objective.md"%}
{% include card.html title="Experience" markdown-content="experience.md" %}
{% include card.html title="Education" markdown-content="education.md" %}
{% include card.html title="Projects" markdown-content="projects.md" %}
{% include card.html title="Skills" markdown-content="skills.md"%}
For each of the sections which you are including, be sure to create the corresponding .md files, inside an _includes/portfolio directory.
Pro-tip: Write the content of your sections separate from implementing the site. I’ve found it’s easiest to do these two things in isolation. Use lorem-ipsum text as a placeholder until you have the actual content.
I highly advise giving the Includes section of Jekyll’s documentation a read - specifically the explanation on passing variables to the partials. The one non-obvious section of the above code-snippet is the capturing of a variable called markdown_include followed by piping it as markdownify. This allows us to render a markdown include as styled html and inject it into the <div> as the main content.
By now, you should have all the basic content for your portfolio and blog, congratulations!
Make it look sexy
Now on to the fun part, making your portfolio look nice! Your portfolio should now have all the content in a semi-structured format:
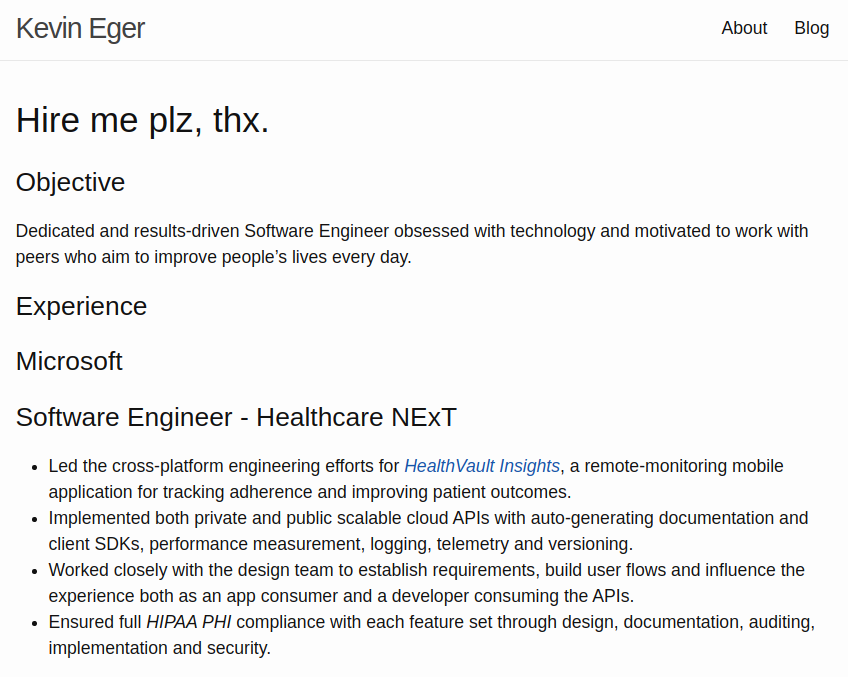
If your site does not resemble the image above or is missing components, be sure to check for build errors as it’s likely a typo was made or a file created in an unexpected spot. Your directory and file structure should be this:
├── _config.yml
├── _includes
|   ├── portfolio
|   |   ├── education.md
|   |   ├── experience.md
|   |   ├── objective.md
|   |   ├── projects.md
|   |   └── skills.md
|   ├── card.html
|   ├── head.html
|   └── home.html
├── _layouts
|   └── home.html
├── _posts
|   └── 2007-10-29-any-post-you-have-made.md
├── _sass
|   ├── page-layout.scss
|   ├── typography.scss
|   └── variables.scss
├── _site
├── .sass-cache
├── assets
|   └── css
|       └── site.scss
├── _config.yml
├── 404.html
├── about.md
├── blog.html
├── Gemfile
├── Gemfile.lock
└── index.html # can also be an 'index.md' with valid YAML Frontmatter
Setting yourself up to style
Remember when I said: “For each of the sections on the portfolio, we are rendering some content into a card.html template that we will later leverage for styling.”? Well now’s that time! Let’s get some scss up in here.
Create an assets/ folder on the root directory and inside it, create a css/ folder and a site.scss file. Jekyll is smart enough to automatically convert sass and scss to css and follow the same directory structure (which is easily overridable if you need).
Since we’re going to be adding stylesheets we are going to need the head.html include with the addition of our newly added site.scss sheet. Go ahead and copy this code into your includes.
<head>
    <meta charset="utf-8">
    <meta http-equiv="X-UA-Compatible" content="IE=edge">
    <meta name="viewport" content="width=device-width, initial-scale=1">

    <title>{% if page.title %}{{ page.title | escape }}{% else %}{{ site.title | escape }}{% endif %}</title>
    <meta name="description" content="{{ page.excerpt | default: site.description | strip_html | normalize_whitespace | truncate: 160 | escape }}">

    <link rel="stylesheet" href="{{ site.url }}/assets/main.css">
    <link rel="stylesheet" href="{{ site.url }}/assets/css/site.css">
    <link rel="canonical" href="{{ page.url | replace:'index.html','' | absolute_url }}">
    <link rel="alternate" type="application/rss+xml" title="{{ site.title | escape }}" href="{{ " /feed.xml
        " | relative_url }}"> {% if jekyll.environment == 'production' and site.google_analytics %} {% include google-analytics.html %} {% endif %}
</head>
In site.scss we will be importing all the partial stylesheets we create, start by stubbing out a page-layout partial.
---
sitemap: false
---

// Partials
@import "page-layout";
As the Jekyll docs point out, if you are using Sass @import statements, you’ll need to ensure that your sass_dir is set to the base directory that contains your Sass files. You can do that thusly in your _config.yml:
sass:
    sass_dir: _sass
The docs advise you create all scss partial files inside a _sass directory, so let’s do that for the page-layout file we’ve stubbed out and imported. For now we’ll just put a basic border with some padding around each portfolio section to make sure everything’s working.
section.card {
    border: 1px solid black;
    padding: 20px;
}
Once you’ve verified everything is working, let’s get jiggy wit it!
Advanced Styling
One of Sass’ greatest benefits is it’s use of variables, a way to store information that you want to reuse throughout your stylesheet. You can store things like colors, font stacks, or any CSS value you think you’ll want to reuse. Sass uses the $ symbol to make something a variable. It’s great practice to have a (or several) variable sheet(s) declared.
// Colours
$base-color: rgba(#222, 0.8);
$secondary-color: rgba(#222, 0.7);
$body-color: rgb(238, 238, 238);
$section-color: rgb(244, 245, 246);
Remember to import the new stylesheet in assets/css/site.scss.
Let’s clean up our portfolio page, giving the body a light background and the sections their own card-like containers with a bit of a shadow:
body {
    background-color: $body-color;
}

section.card {
    background-color: $section-color;
    margin: 40px 0;
    padding: 40px;
    box-shadow: 0 0 0 0, 0 0px 25px rgba(34, 34, 34, 0.15);
    border-radius: 3px;
    position: relative;
    p {
        margin: 0;
    }
}
Rather than just use the default Helvetica font, let’s stylize our family a bit to make it pop.
I’ve chosen to import the Ubuntu font from Google Fonts, and added the variable:
@import url('https://fonts.googleapis.com/css?family=Ubuntu');
$base-font : 'Ubuntu', serif;
Create a new typography.scss sheet (be sure to import it in site.scss), and add to the body:
body {
    font-family: $base-font;
}
One thing you may want to do is bring in images. Jekyll makes referencing static assets quite easy. Save whatever desired decals for your cards you which to have in the assets/img folder. To reference them, you can simply do it by path (ie: {{ site.url }}/assets/img/my_sweet_img.jpg).
I’m opting to add an additional variable to my card include called decal-img, passing in the file name to the partial. This addition will require image files put into assets/img, the new variable set when the partial is invoked in home.html, an update to card.html to show it and updated styling. The latter three changes should look something like this:
---
layout: default
---

<div class="home">
  {% include card.html title="Objective" decal-img="objective.svg" content="objective.md" %}
  {% include card.html title="Experience" decal-img="experience.svg" content="experience.md" %}
  {% include card.html title="Education" decal-img="education.svg" content="education.md" %}
  {% include card.html title="Projects" decal-img="projects.svg" content="projects.md" %}
  {% include card.html title="Skills" decal-img="skills.svg" content="skills.md" %}
</div>
<section class="card">
    <header class="card-title">
        <h1>
            {{ include.title }}
        </h1>
    </header>
    {% if include.decal-img and include.decal-img != "" %}
    <img class="decal" src="{{ site.url }}/assets/img/{{ include.decal-img }}" alt="Decorative decal for the {{ include.title }} section">
    {% endif %}
    <div class="card-content">
        <!-- Markdown Content -->
        {% if include.markdown-content %}
            {% capture my_include %}{% include portfolio/{{ include.markdown-content }} %}{% endcapture %}
            {{ my_include | markdownify }}
        {% endif %}
    </div>
</section>
body {
    background-color: $body-color;
}

section.card {
    background-color: $section-color;
    margin: 40px 0;
    padding: 40px;
    box-shadow: 0 0 0 0, 0 0px 25px rgba(34, 34, 34, 0.15);
    border-radius: 3px;
    position: relative;
    .decal {
        position: absolute;
        right: 10px;
        top: 10px;
        max-width: 50px;
        max-height: 50px;
    }
    p {
        margin: 0;
    }
}
The last piece of styling I’ll guide you through is cleaning up the individual portfolio card’s, the rest is up to you!
To achieve a more hierarchical title scheme, the card title should be a bit larger and be on the same line as the decal image:
header.card-title {
    display: inline;
    font-size: 1.3em;
}
The remaining headers in each of the cards should be a bit closer together, and it would be nice to have dates on the applicable fields.
Add the following class styling inside our section.card styling:
.card-content {
    h1 {
        font-weight: bold;
        line-height: 0.75em;
        display: inline;
    }
    h2 {
        margin-bottom: 5px;
        color: $secondary-color;
        font-size: 1.3em;
    }
    h3 {
        margin: 0;
    }
    p.date {
        float: right;
        color: $secondary-color;
        }
    }
Congrats!
I hope you enjoyed a quick exposure to Jekyll and learning just how easy spinning up a portfolio can be. Arguably the most important part is left for you - deployment! Luckily with GitHub pages, it is dead simple and can be done in about 5 minutes. Follow GitHub’s directions and happy trails :).